ArchLinux安装(一)
summary
type
status
slug
category
date
tags
icon
password
comment
SLUGS
先上折腾的截图
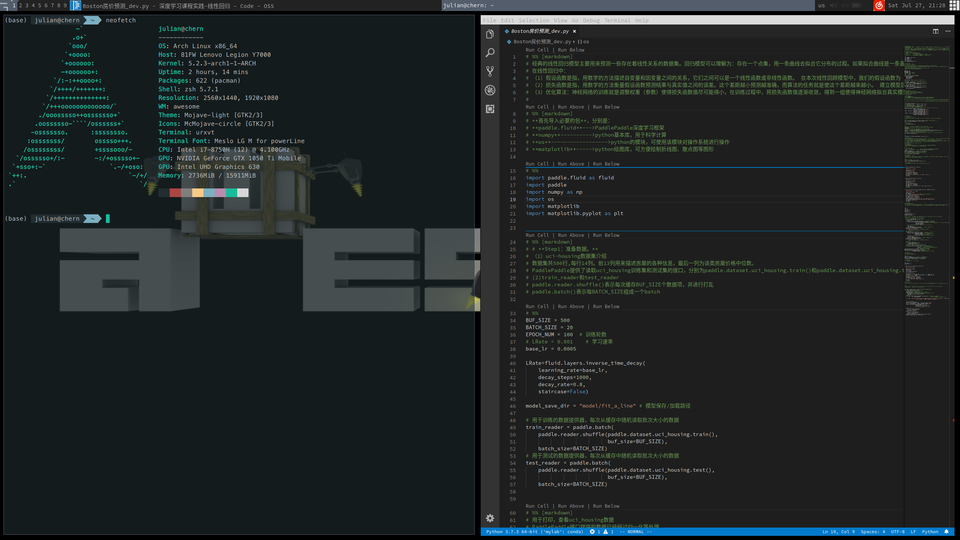
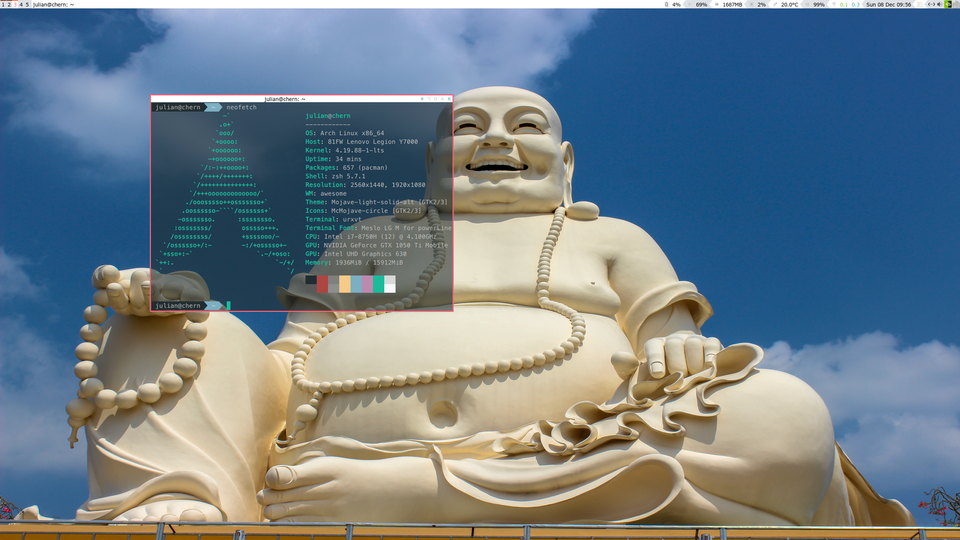
2019-12-06:由于Arch对base包做了改动,并且官方的安装指南已经很详细了,所以建议参考
准备工作
- 网络:有线无线均可(不过建议使用有线网络,无线网络在安装完系统重启后,可能需要安装wifi-menu。老司机不会看本文。)
- PC:足够大的空间与内存(测试为50G硬盘,4G内存)
- 镜像文件以及U盘(建议8G以上)
- (非必要)有安装Linux经验
- (要)充足的时间投资(1.5h左右,因人而异)
- (必要)遇到问题能冷静分析坚持解决的操作员
由于安装过程,许多命令需要纯手敲,建议安装前,门前埋雷,以防干扰!
你可以ssh连接Arch,这样就不用每一条命令都手敲了。
U盘刻录
简述:使用Win32 Disk Imager刻录ISO镜像到U盘中
采用UEFI模式启动。(BIOS模式在后面的安装中并无差别,只是安装引导时有所不同,有经验者可自行操作)
进入安装环境
通过U盘启动进入安装环境。
网络连接
进入后,确保网络连接成功。
有线网络:
ip a #查看网卡kou
dhcpcd enp0s3 #改为你的网卡口
无线网络使用
wifi-menu命令选择连接。陆续输入:
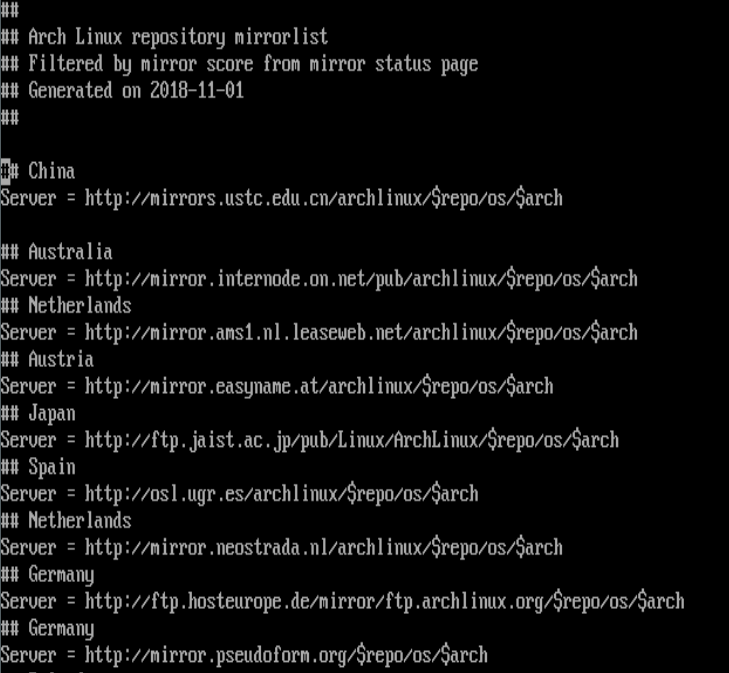
换源
更换安装源,以便下载速度更快。
搜索China,将
剪切到配置文件开头。
启动模式检查
键入:
ls /sys/firmware/efi/efivars若存在输出目录,则为UEFI模式启动。
磁盘分区
分区方案可自己任意确定,下面给出out of date的分区方案(因为对大内存机器而言,无需swap分区。讲道理,要不是怕搞坏引导不便修复,我只想给一个
/分区)
1.确认安装位置:
键入:fdisk -l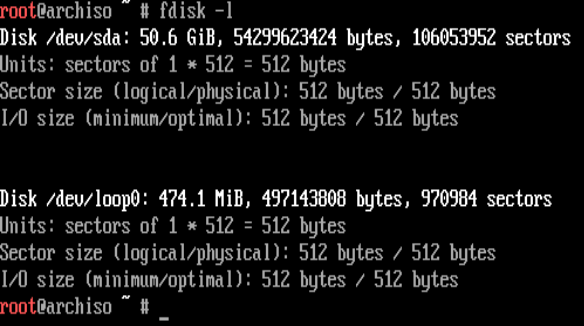
此处确定安装位置在sda上。
2.确定分区方案:
3.开始分区:
键入:
cfdisk /dev/sda,选择gpt: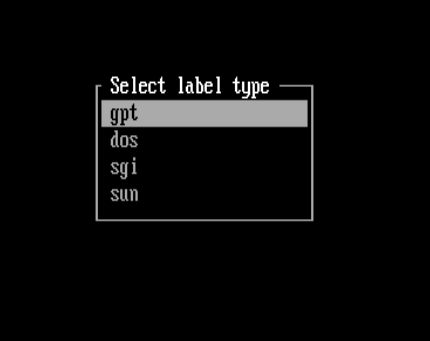
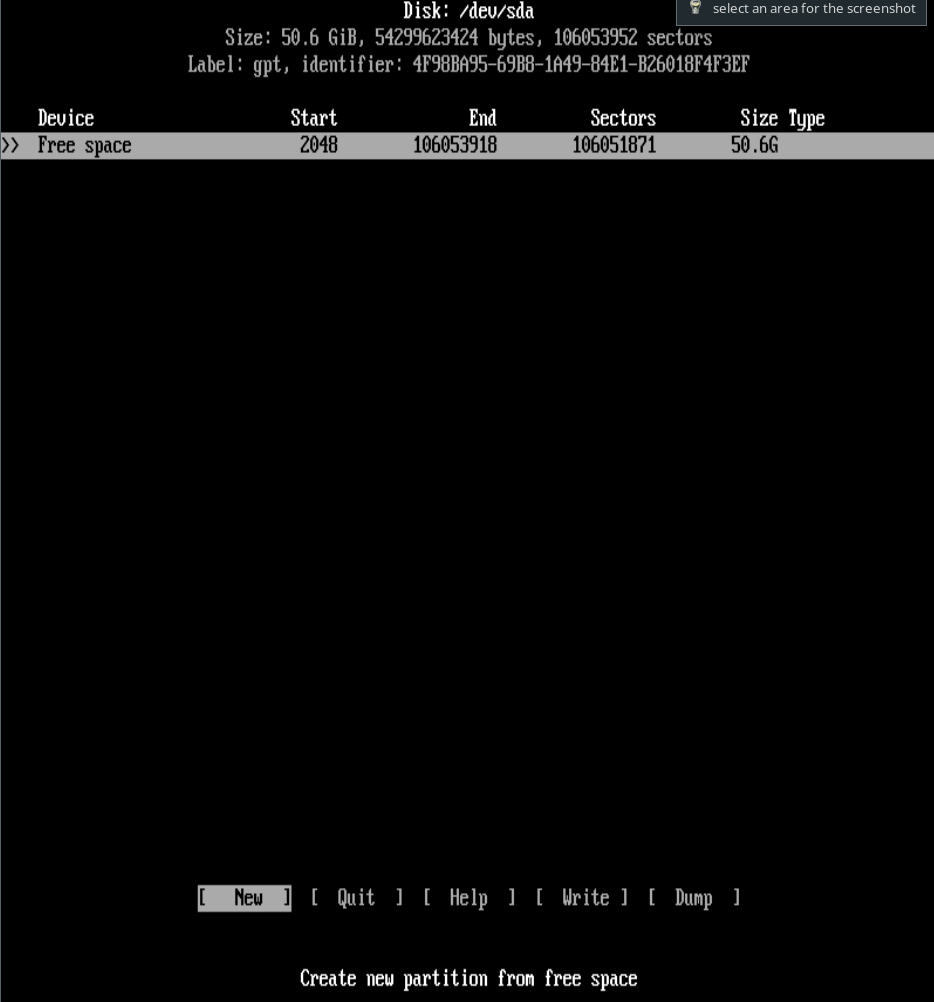
建立分区:
新建分区:[↑]/[↓](方向键)选中 Free space(空闲空间)[←]/[→](方向键)选中 New 新建分区[←]/[→](方向键)选中 Type 选择分区类型(默认为 Linux filesystem;对于 EFI 系统分区选择 EFI System)输入分区大小(默认单位为字节,可以加上后缀K、M、G),[回车键] 确认 写入分区表:[←]/[→](方向键)选中 Write输入 yes [回车] 确定写入
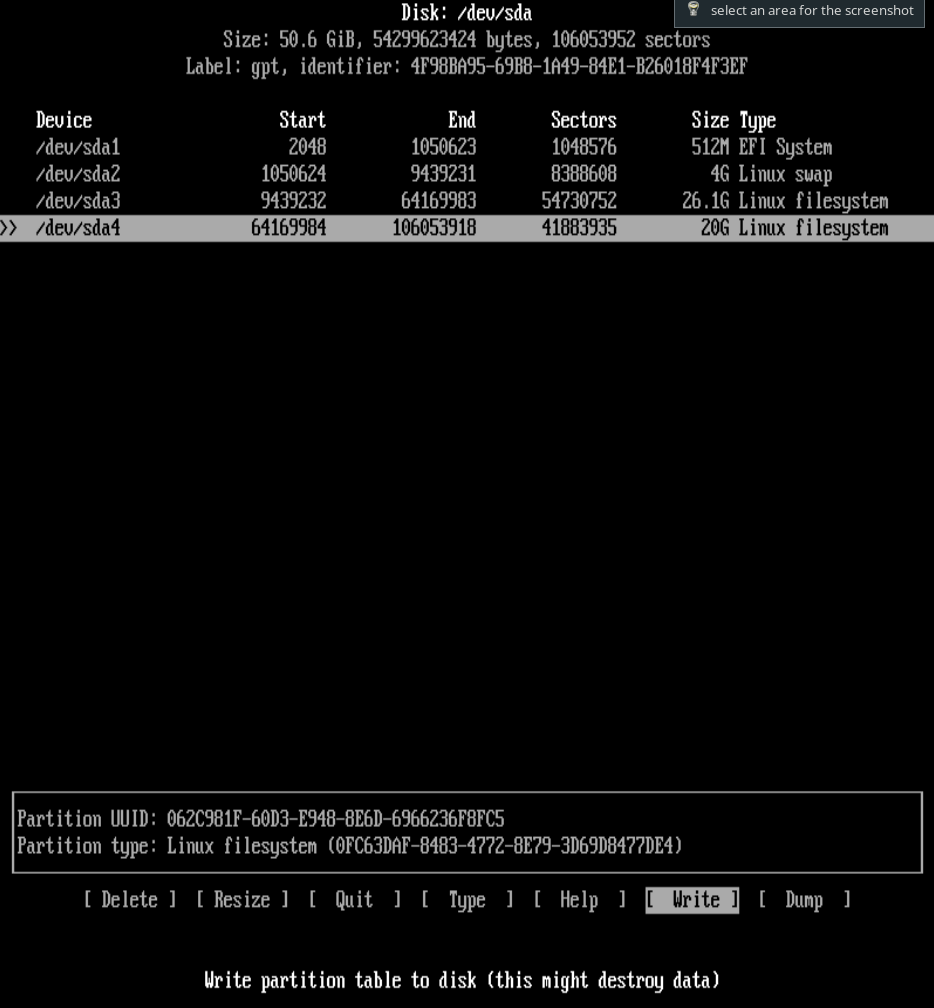
本文分区方案不详述,可自行查阅文章,当然你也可以使用其他的分区方案。
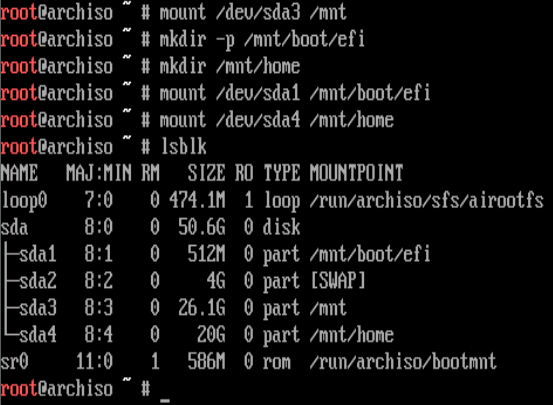
4.格式化分区并挂载:
先格式化:
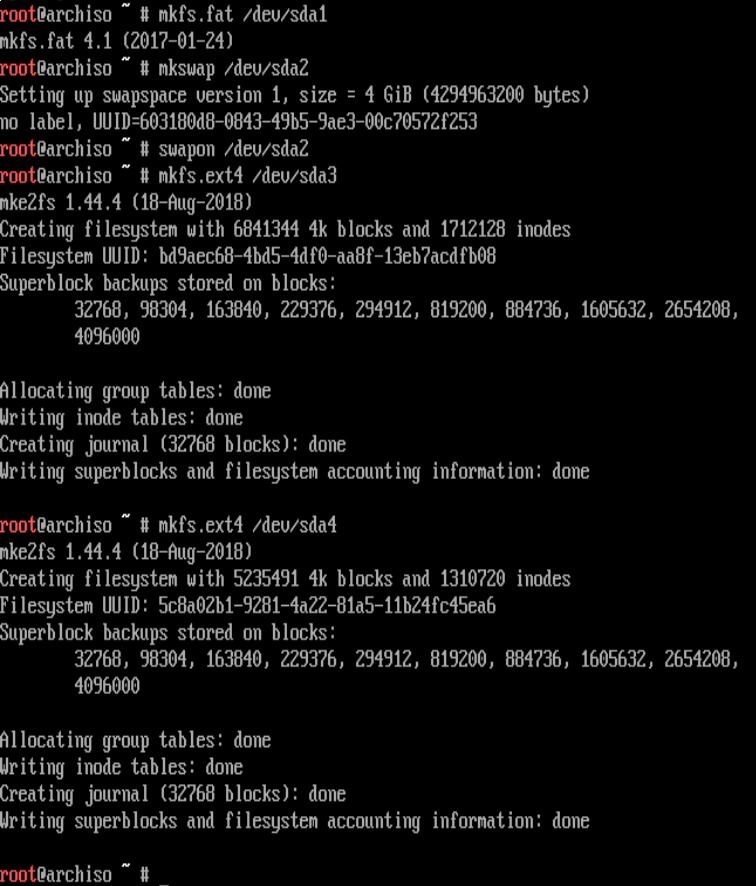
后挂载:
安装系统
2019-11-01:据说Arch的base做重大改动,base包被精简,内核包linux变为可选依赖,所以此处命令应为pacstrap /mnt base base-devel linux dhcp netctl linux-firmware
坐等近10分钟,安装完成:
配置系统
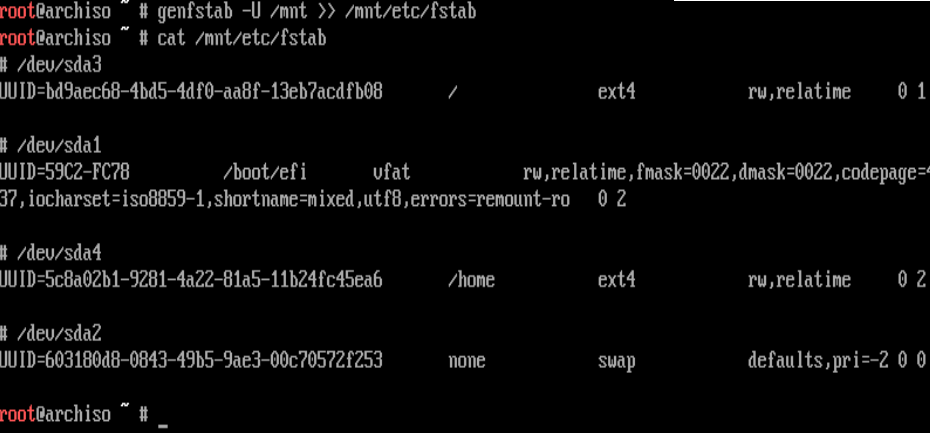
生成分区表
进入新系统
设定时区
本地化设置
设定主机名
root用户密码更改
安装引导程序(推荐refind)
grub
其中第二条指令的挂载点可以自己根据你所做的分区方案更改: grub-install --target=x86_64-efi --efi-directory=<EFI 分区挂载点> --bootloader-id=GRUB

refind
注意refind_x64.efi路径
修改/boot/refind_linux.conf内容:
其中的
ro root=/dev/sda3是你挂载/的分区。
2019-07-26提醒:若initrd=/boot/intel-ucode.img initrd=/boot/initramfs-linux.img无法启动Arch,那么可去掉/boot进行尝试,差别原因尚不明。也可参考:
完成安装
重启后,以用户名root登录。
networkmanager会自动连接有线网络,查看以太网卡接口(当然可以使用wifi-menu连接无线网络)
ArchLinux相关配置见:ArchLinux安装(二)-安装并配置AwesomeWM
参考文章:
Loading...